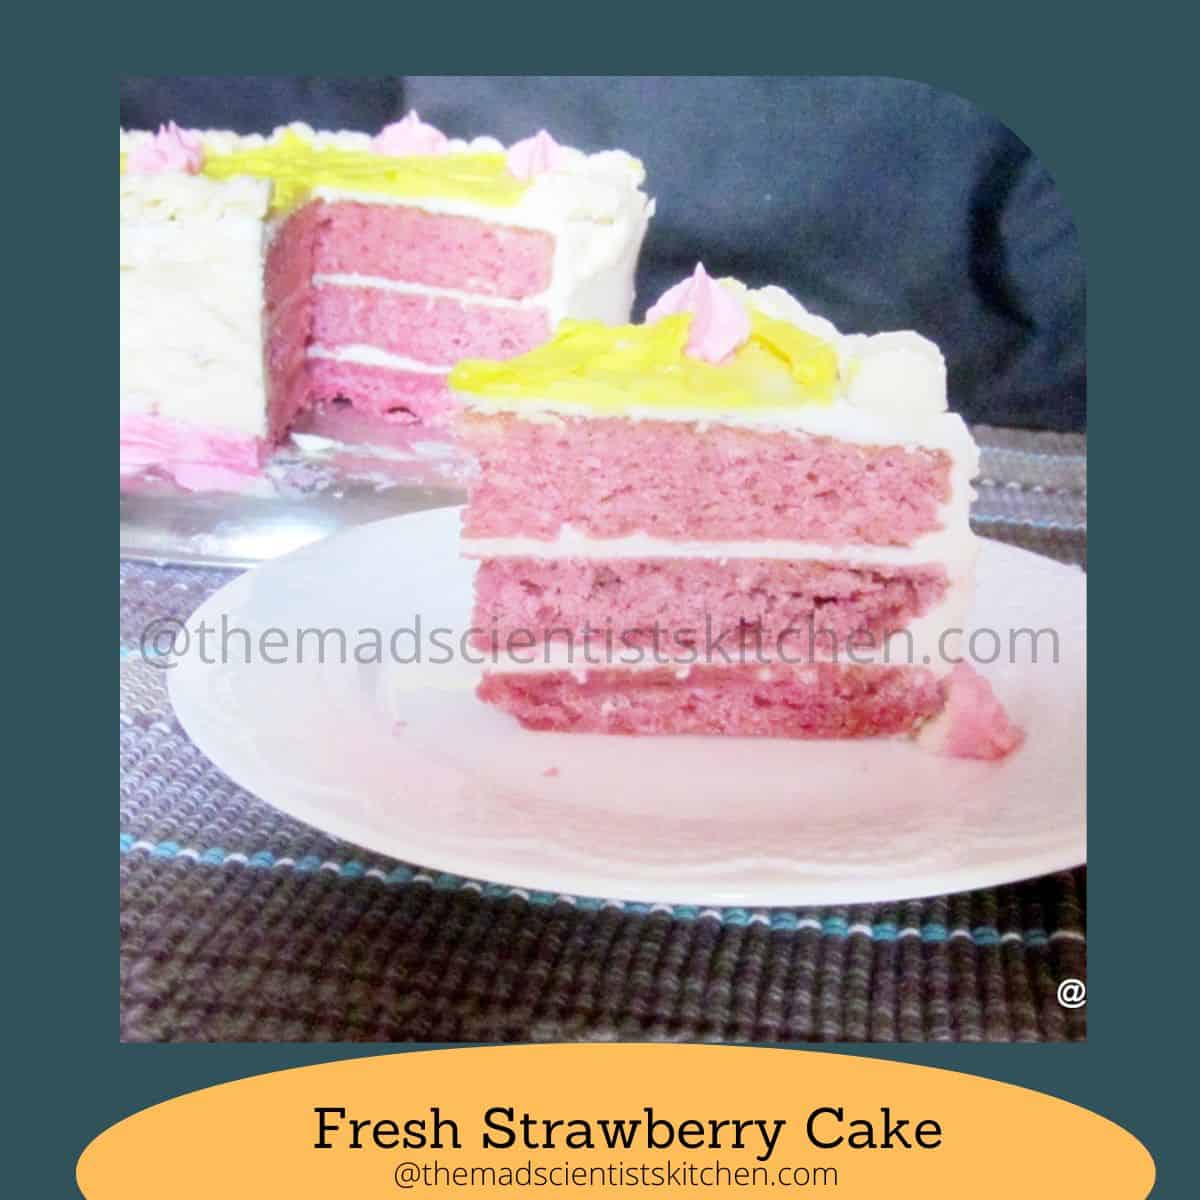
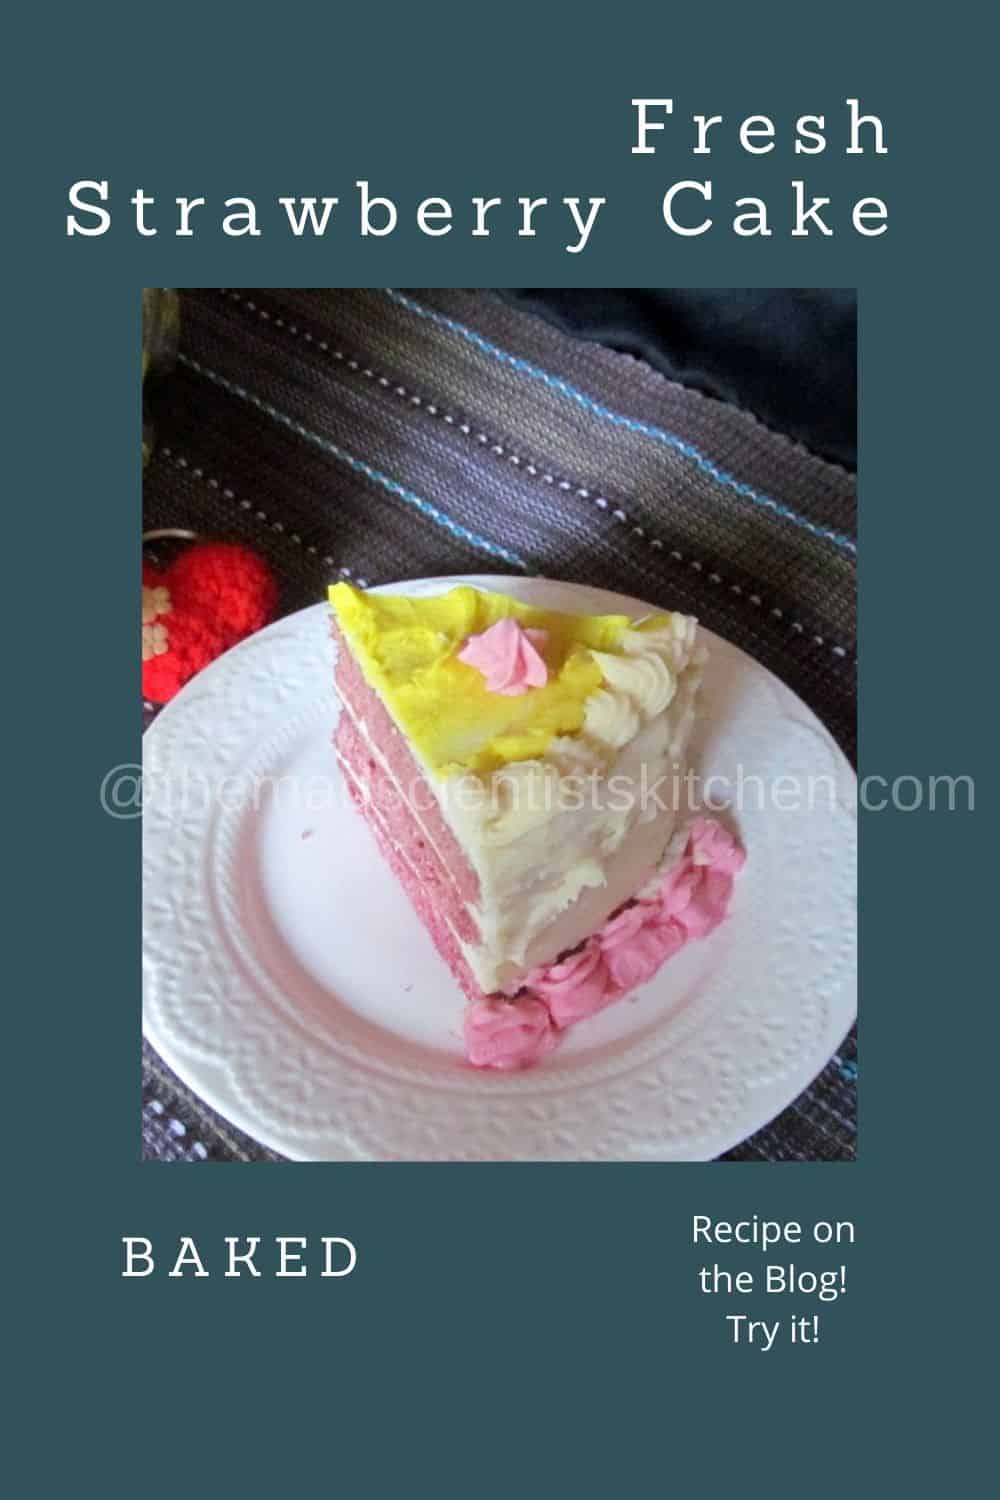
In the month of October 14 for Baking Partners we were to make Strawberry Cake. The cake was suggested by Divya Ashok of Divya’s diner. She is an awesome cake designer, bakes and sells cake for birthdays, weddings etc.
Divya had suggested making a fresh strawberry cake with simple cake decoration; these decorations were something we could use in future.
Actually Swathi had mentioned that we could use any fresh fruit, we had the option of making it eggless too but after seeing the delicious and beautiful cake that was attached I thought I will wait for strawberries to come to the market.
Needless to say I was late and now since I was late I decided to “Fire my Oven this April” in the month of February. The final cake was done on Valentine day!
 |
| Fresh Strawberry Cake |
Fresh Strawberry Cake with Decoration Basics
Recipe adapted from America’s Test Kitchen
Ingredients:
This recipe holds good for two 8”cake layers.
For the Cake:
- 2 ¼ cup of Cake flour, sifted
- 4 tsps of Baking powder
- 1 teaspoon of Salt
- 1 ¾ cups of Sugar
- ¾ cup of Unsalted butter (1 ½ sticks or 12 tblspn)
- 4 large eggs (or 6 large egg whites), room temperature
- ¾ cup of Strawberry puree
- ¼ cup of Milk
- 2 tsps of Vanilla extract
- 1 teaspoon of Strawberry extract (optional), if you don’t get good
ripen strawberries
For the Strawberry Puree
907 grms fresh Strawberries very ripe (frozen strawberries
- without sugar)
- 1 tblspn of Sugar
Method:
For the Strawberry Puree:
- Wash and hull fresh ripe strawberries. Cut it in to small pieces and transfer it to a bowl.
- Add a tblspn of sugar and give a quick mix. Cover it and allow it to sit for 2-3 hours/ overnight in the refrigerator. Strawberries will become tender and juicy.
- Simmer the tender strawberries in a pan with ¼ cup of water for 20-25 mins in low flame. (Taking care not to burn any). Mash it well with a spatula and allow it to cool.
- Transfer the contents to the blender with ¼ cup of water and puree the cooked strawberries.
- Filter the puree to remove any chunky pieces. As this will result in a mushy cake.
- Again bring the filtered puree to the stove and slow cook it in low flame for another 15 mins. Reduce
the puree to ¼ cup. (If you have a little more puree that’s fine. You can use that as a filling later) - Strawberry concentrated puree is ready.
For the Cake:
- Preheat oven to 180°C/350° F.
- Grease and dust (flour) two 8” pans.
- Take the butter cut it in to pieces and allow it to sit at room temperature.
- Break the eggs in a bowl and keep it ready.
Wet Ingredients:
- In a small bowl, take ¼ cup of cooked strawberry puree and add ¼ cup of milk and whisk it.
- Add vanilla extract & strawberry extract (optional).
- Whisk in eggs, one at a time and keep the mixture ready.
Dry Ingredients:
- In a large mixing bowl, sift cake flour. (Standard substitution will be 1 cup cake flour = 1 cup of APF - 2 tblspn of APF + 2 tblspn of corn starch)
- Add baking powder and salt. Mix it slowly with a hand held mixer.
- Toss in softened butter and continue mixing till you get ‘bread crumbs’ like texture.
- Slowly add the wet ingredients mixture little by little and the cake batter is ready.
- The colour of the batter is the colour of the cake once baked and it’s not going to turn pink. So if you want the cake to look pink, add few drops of beet juice or red food dye. ( I added colour).
- Pour the batter equally in to two prepared pans. The mixture will not be runny and it will be difficult to spread. Don’t use spoon to spread it, instead drop the pans on the counter multiple times to level the batter.
- Bake for 25-30 mins or until a skewer inserted comes out clean.
- Once done, remove the pans from the oven and let it sit in the counter for 10 mins.
- (Tip: Press the bulges of the cake with a wet clean white cloth as soon as you remove from the oven. Taking care all the time not to burn your hands. You may not need to trim a lot of cake, while stacking also it gives clean edges.)
- Cover it with plastic wrap and transfer it to the freezer for a night. (Make sure your cake is completely wrapped and is not exposed, else your cake might turn dry).
Decorating a Cake:
- Remove the cake from the freezer 4 hours before you start decorating and place it at room temperature.
Basic Butter cream Frosting Recipe
Ingredients:
- 1 ½ cups of Unsalted butter, softened
- 4 ½ cups of Powdered sugar, sifted
- 3 tblspn of Heavy cream
- A pinch of Salt
- 1 teaspoon of Clear vanilla extract
Method:
- In a large mixing bowl, add softened butter and mix it till it becomes creamy.
- Add sifted powdered sugar, heavy cream, salt and clear vanilla extract and mix it for couple of
mins. - Delicious butter cream is ready.
Basic Cake Decoration:
Keep your things ready.
You may need a turn-table( I do not have), cake board, a spatula, cakes, butter cream, a small spoon.
Method:
Levelling, Filling & Stacking the layers:
- Trim the edges and level the cake.
- Take a cake board. Add a spoon of frosting in the center and spread it. Top it with a cake layer. Trimmed edge facing down.
- Add a tblspn of strawberry puree to ¼ cup of frosting (Since my puree had been licked clean from the container I used plain butter cream).
- Mix it and fill it between the cakes. Spread evenly with a spatula.
- Stack another layer on top with trimmed side facing down.
- Add ½ cup of frosting on top and spread it evenly on the sides. Just make sure the cake is totally covered with frosting. This is called crumb coat. (We are just locking up the crumbs of cake with the frosting). Let it sit in the refrigerator for 1 hour.
- Remove the cake from the refrigerator and add generous amount of frosting on top and sides. Spread the frosting. You don’t need to have a smooth finish as we are going to have an unfinished look. (This is the look I wanted and could manage without stretching my art skills).
For Unfinished look:
- Take a spoon. With the rounded sided up slowly move on the sides from down to up, creating a pattern on the cake.
- Then on top creating a rustic unfinished look. It’s easy & very simple to follow.
Rosette Cake:
Another popular and most beautiful decoration will be the rosette. It’s simple and very easy to follow. (May be someday I will have the courage to try this look).
Things needed:
Crumb coated cake, decorating bags, 1M tip & turn-table
Method:
- Cut the ends of decorating bags and insert tip 1M inside.
- Place the bag on a cup and fill ½ of decorating bag with frosting.
- Roll the edges and you are all set to pipe.
- Start in the lower side of the cake. Make a dot and pipe all around the dot like a circle. Go all the way around the cake. Try not to leave space between the roses.
- In the end cover-up all the spaces with the frosting.
 |
| Fresh Strawberry Cake |
Day 24

Hi! First time here? Well then you are Most Welcome! I hope you keep coming back for more here. If you are my regular visitor then Thanks, for you encourage me to experiment more!! I would like you to please click on my link below and like my Facebook Page. I will be happy if you can follow me on on Twitter too!

Pin for later:

Ms.Chitchat says
wow, very professional looking cake, perfect.
Srivalli says
Wow wow Arch, you need to put up sbs pictures for us now..:)..the decoration is so beautifully done!
Usha says
Delicious and beautifully decorated cake,Archana
Nalini's Kitchen says
Wow!!!!beautifully decorated cake Archana ,looks gorgeous.
Priya Suresh says
Beautifully decorated cake Archana, frosting a cake is definitely a hard task for me, you nailed it prefectly.
Julie says
loved the cake totally,yummy!!
vaishali sabnani says
Archana this cake looks fantastic! Very well made and your patience shows here:)) truly a very beautiful cake.
Harini-Jaya R says
The decoration looks very good, Archana.
Suma Gandlur says
The layered cake looks beautiful with decoration.
Pavani N says
That is a stunning cake Archana. Love the decoration as well. Very well done.
Nivedhanams Sowmya says
very beautifully decorated!!! wow i am stunned!!
Sandhya Ramakrishnan says
This cake is decorated so well Archana! Lovely job 🙂